Mount Moffit viewed from near our second campsite, about four miles away from Trident Glacier and five miles from the base of the mountain.
At the end of an exceptionally rainy July, a stretch of clear weather appeared in the forecast and I decided to make the most of it by setting out for Trident Glacier near the base of Mount Moffit with my friend Ryan. Reaching this remote area in the summer requires floating across the wide and braided Delta River unless you have the means to fly in. On the morning our adventure started, I was caught off guard by a reddish haze in the sky on my drive into Delta Junction, and I couldn’t see nearby Granite Mountain even though there wasn’t a cloud in the sky. Wildfire smoke from Siberia had drifted over Alaska, and I hoped it would dissipate by the next day so the haze wouldn’t destroy my opportunity for close-range big mountain shots.
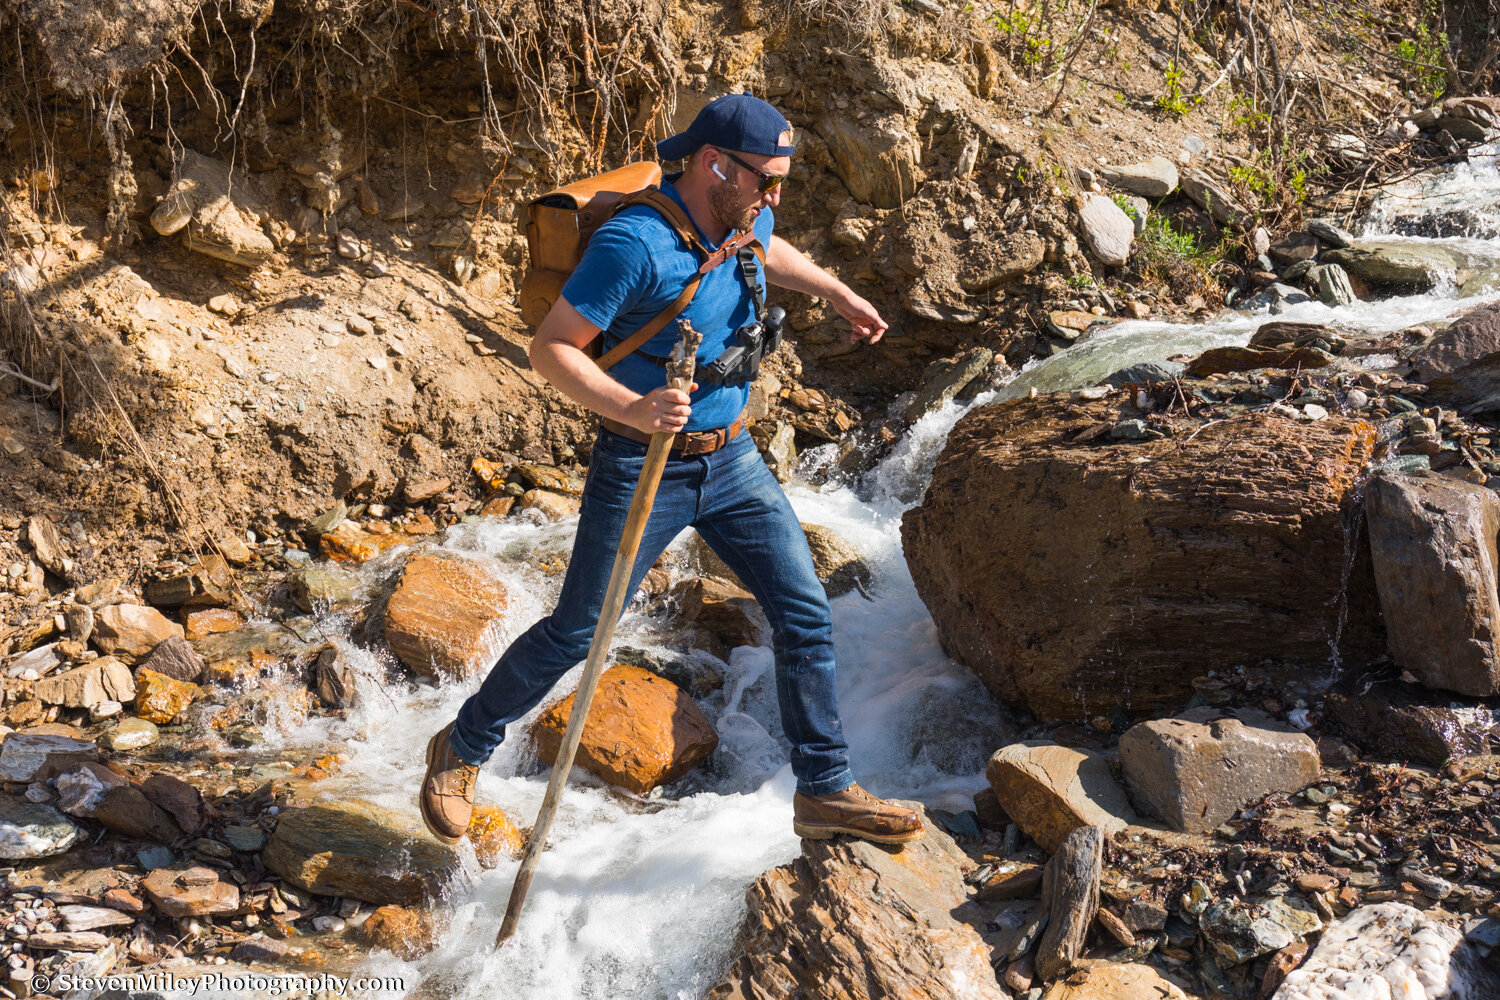
Recent heavy rain made crossing the Delta River more difficult than usual. Typically, I’m able to wade across many of the smaller braids of the river until I reach the largest one (which is always too deep to wade) and I float across to the mouth of McGinnis Creek with ease in my packraft. But Ryan and I had to hike farther upstream than usual to cross one overflowing braid before we rafted across all the rest, hopping out onto gravel bars a few times to drag our rafts into an adjacent braid. Ryan had packrafted several Alaska rivers before but was still struck by the size of the Delta and its strong currents. While the river is mostly devoid of rapids and large wave trains in this area, there are strange whirlpools and clashing currents where the braids intersect that can quickly spin a raft. Several people have flipped or sunk amphibious vehicles, ATVs, and various watercraft trying to cross the river here, so don’t take the crossing lightly.

Crossing McGinnis Creek. The Delta River is in the background with the mountains obscured by wildfire smoke.
After we reached the far side, we stowed our rafts and waded McGinnis Creek in a braided spot. From there, we hiked up the gravel bar and hopped onto an ATV trail that starts along the north edge of the creek and conveniently leads above tree line. Along the trail, I spotted several wood frogs, including one large frog that sat still while I crept very close for a macro shot. I’ve only seen a few wood frogs in Alaska, though I have heard many more while photographing sunsets at small ponds in the spring when males are busy serenading females. After taking my first ever picture of a wood frog, I felt my photography expedition couldn’t be a total failure even if the wildfire smoke failed to clear.
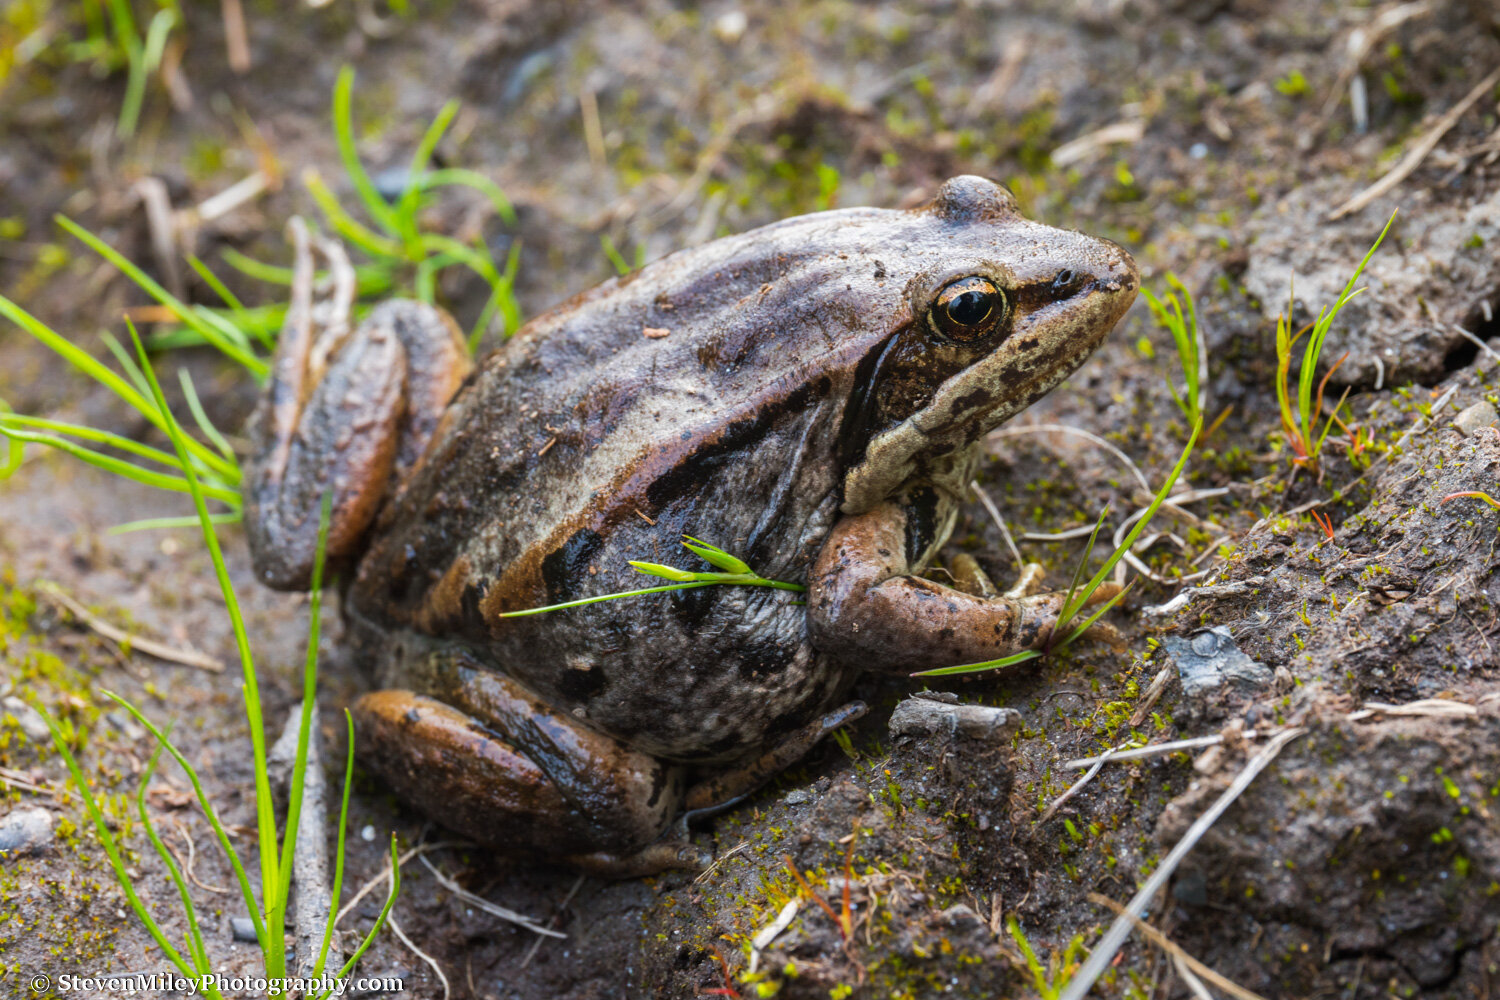
Wood frog.
We followed the trail across wide open terrain to a private cabin with an airstrip. A network of ATV trails originates from the cabin, crisscrossing miles of otherwise remote wilderness. It’s hard to believe people go through such effort and expense to get motorized toys across the Delta River to make their hunting trips easier and feel no shame about leaving ruts everywhere in a place so wild. It’s not like the Denali Highway or other motorized hunting areas with easier access where people enjoy the trails throughout the whole summer for fishing, camping, and other recreation besides hunting. That being said, the ATV trails sure make hiking easier, muddy as they are.
After crossing another mile or two of open terrain full of berries and wading through a rushing creek, we began ascending a grassy ridge shortly before sunset. I still couldn’t see the mountains through the haze, so I stopped worrying about finding a scenic spot to camp. We arrived at a flat spot on the ridge and pitched our tents. The wind picked up overnight and by 6 a.m. it was rattling my tent so hard I couldn’t sleep. One of the pole’s on Ryan’s tent snapped. I broke my tent down and crawled over to a low spot out of the wind and dozed for a while in the warm morning sun.

Caribou antler shed with Mount Moffit in the background. We found several sheds and bones on the trip and passed signs of bear, moose, caribou, wolf, and sheep.
With the wind howling and the mountains beginning to emerge through the haze, we continued up the ridge. We passed a large granite tor that provided a short respite from the wind, then continued until the ridge joined with a steep tundra slope leading to a higher alpine ridge. A lone caribou climbed up the slope ahead of us, effortlessly gaining elevation and seemingly uninterested in posing for pictures. About half-way up the slope teeming with wildflowers we stopped at an idyllic stream and ate lunch. It was so warm I briefly thought about sunbathing there the rest of the day instead of hiking.
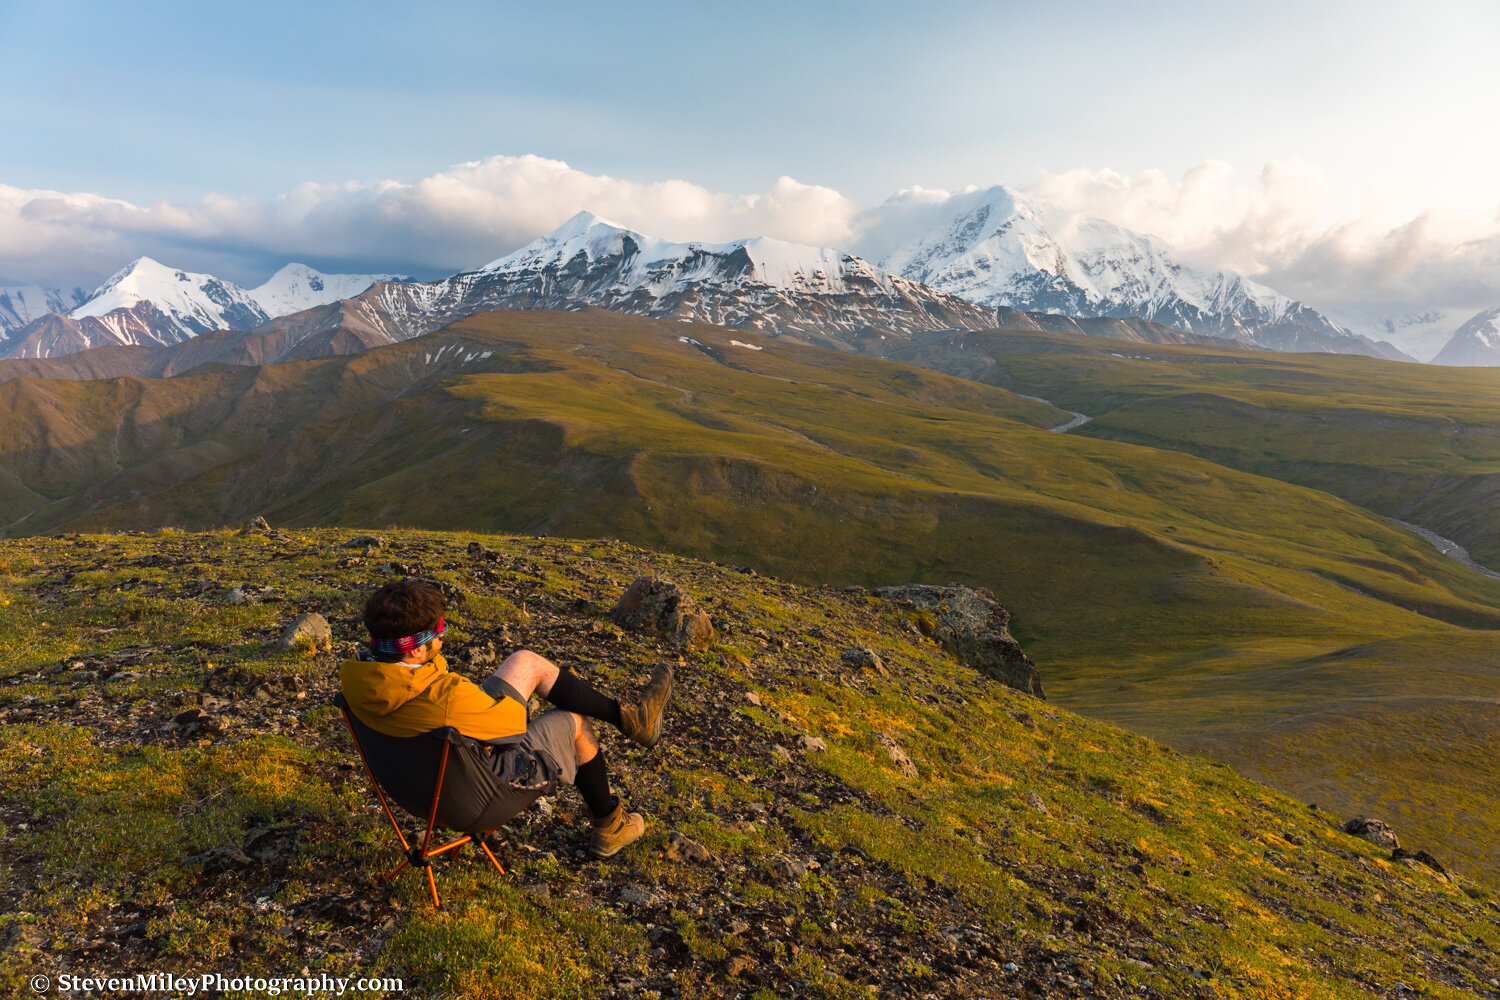
Relaxing near camp with views of McGinnis Peak and Mount Moffit.
On top of the alpine ridge we found a caribou trail and plenty of recent tracks. We continued about a mile along the ridge until it descended several hundred feet to a pass below. With over four miles left to Trident Glacier and quite a bit of uphill and downhill left if we continued forward, I stopped to evaluate our options. While the haze on the mountains had improved significantly, a layer of wildfire smoke still lingered low on the horizon, and I knew it would probably kill the best sunset and sunrise light. Ryan, who brought 10 or 20 pounds too much gear (including a drone, a DSLR with a tripod, a camp chair, a gun and bear spray, a full wardrobe, etc., etc.), couldn’t hike very fast on the uphill sections, and, while he still would have pushed on, I didn’t think we would have been able to hike 16 miles back to the Delta River the next day to avoid rain in the forecast and the need to stretch our food supply. So, we pitched camp with some impressive views of McGinnis Peak, Mount Moffit, Moby Dick, and Mount Hayes, and I did my best to catch a few cool shots of the mountains despite the lingering haze. The wind died down after sunset and I slept great on a cushy bed of spongy tundra.

The unnamed 12,000+ foot mountain between Mount Moffit and Mount Hayes, unofficially named “Moby Dick”.
The next morning, I caught a few detailed shots of the big mountains draped in dramatic shadows before the clouds blocked the sun for the rest of the day. After we packed up, I started hiking back along the ridge by myself to capture some shots of Ryan from a distance in front of Mount Moffit and Moby Dick. As he approached me, two caribou appeared out of nowhere between us. They walked right past me, disappeared over a hill, then reappeared a few minutes later as they crossed the drainage down below.

Caribou.
The route on our return hike led entirely downhill so we kept a comfortably fast pace. We encountered two moose on the way and Ryan stopped to gather blueberries and salmonberries for his wife. I noticed some fresh bear scat on the trail just before we hit the tree line but luckily we avoided a bear encounter. Once we reached the river and retrieved our rafts, we waterproofed our gear and carried our rafts upstream far enough to ensure we could cross the main braids with plenty of room to maneuver. Ryan brought a drysuit so he stayed comfortably warm, but I wore shorts and tennis shoes, so my lower half froze every time I waded one of the braids as we plodded across. We reached the final braid just before sunset and casually floated along it for five minutes back to the truck we left parked beside the river.
I wanted to make this trip in 2019 after being thwarted by rain during my 2018 traverse from Black Rapids to Healy, but I declined to because of the persistent wildfire smoke that covered Interior Alaska most of the summer. It’s a bit ironic that I was thwarted by wildfire smoke this summer when Alaska has had a particularly quiet wildfire season and record-setting rain. I guess I’ll just have to try again in 2021.

Taking in the sunset after packrafting across the Delta River at the end of the trip.