Marked Trail (one-way): 1.2 miles, 1050 feet elevation gain
Entire Route (one-way): 4.5+ miles, 4800+ feet elevation gain
This guide describes Grizzly Creek Trail, a newly marked trail in the eastern Alaska Range which leads above tree line, as well as the route beyond the end of the trail to the ridgeline above Jarvis Glacier. The trail has existed for years (it’s an old hunting trail) but it was poorly marked and partially overgrown until Summer 2020. While the trail is currently clearly marked with trail marking tape and clear of brush, there is no signage along the trail, including at the trailhead, so it is recommended that you bring this guide with you along with a map of the area and a GPS device. (You can save or print a PDF copy here.) Unlike a signed, maintained trail, expect to encounter a few obstacles such as fallen trees, minor bouts of uneven terrain, etc.
Directions to trailhead:
Drive 35 miles south of Delta Junction on the Richardson Highway and turn onto a pipeline access road on the left-hand (east) side of the highway about one mile past the Darling Creek bridge and less than one-half mile before the One Mile Creek bridge. The highway mile marker is approximately MP 229.2, while the pipeline mile marker (noted on a small brown sign at the intersection) is 575.5. The road leads to a locked gate with a path leading around the gate on the left. There is room to park on the left side of the road in front of the gate for a couple vehicles, but additional vehicles may need to park near the highway or across the highway. (Be sure not to block the gate.) Permission isn’t needed to park here or cross the pipeline right-of-way on foot, but you may want to leave a note in your windshield to let pipeline security personnel know you are simply crossing the right-of-way to go hiking. The parking area is located at approximately 2100 feet altitude.
Trail guide:
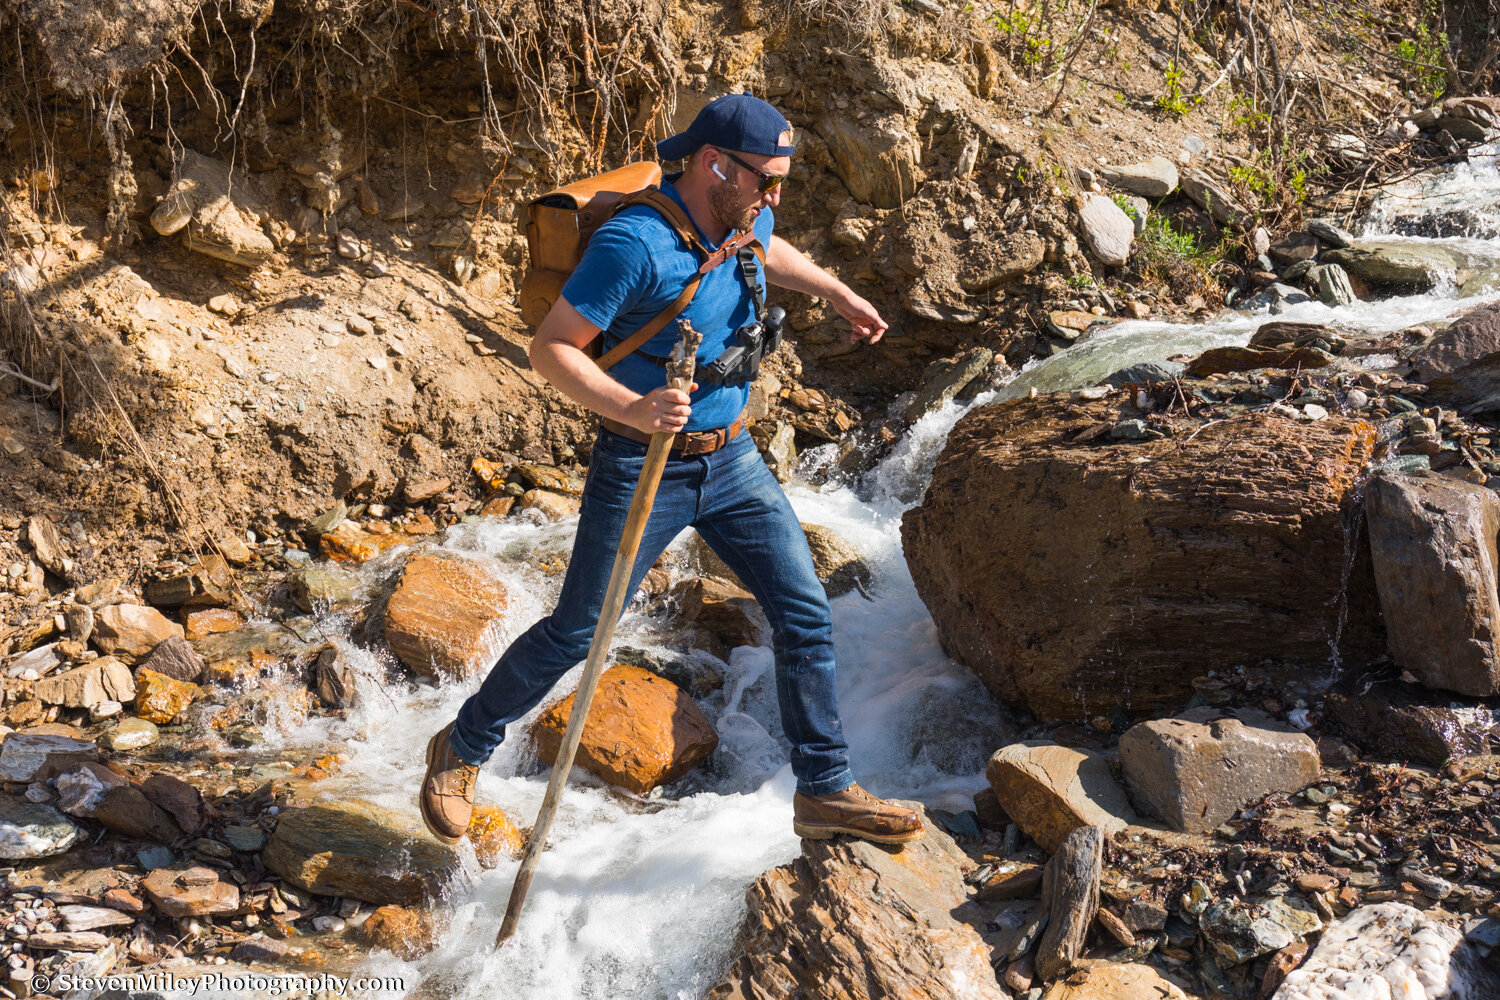
Crossing Grizzly Creek.
From the parking area, hike around the gate and up the road to the pipeline right-of-way, a wide cut through the forest along which the pipeline is buried and an associated service road runs. Turn right and follow the right-of-way for a few hundred feet until you reach a small creek marked “Grizzly Creek” by a brown pipeline sign. Turn left and follow the creek upstream for 0.3 miles. There are no trail markers along the initial portion of the creek. The creek is shallow and you will be forced to cross it several times where it pinches against the brush on the edge—waterproof hiking boots are fine for people who can jump 4-5 feet, but if you can’t jump this far or your shoes aren’t waterproof you may want to bring an extra pair of shoes or muck boots to wade the creek as a backup, or at least extra socks. Navigating the creek may be challenging for beginners, but it should be easily possible to keep your feet dry if you pick your crossing points wisely. Be careful not to slip on wet rocks! As you hike up the creek, you will be looking for a point where a small side channel of Grizzly Creek enters from the right around an island of rocks and brush. (This channel may be dry in periods of low flow.) Pink trail marking tape has been used to mark the trail starting from this point and you should see tape markers leading up this small side channel and into the dense brush on the right about halfway around the island. Follow the trail through the brush for <0.1 miles until it intersects the creek again, then rock hop up the creek for 10 yards until the trail picks up again through the brush on the right. (This area is obviously marked and there is a small, picturesque waterfall blocking further easy passage up the creek.) The trail meanders through tall trees and over a couple small, awkward hills for another <0.1 miles, then turns right at a big tree and begins climbing uphill through forest. You’ll see another large tree fallen across the trail here with “Grizzly Creek Trail” painted on it so you will know you’re heading the right way.

The forest section of the trail is mostly easy to follow as it climbs uphill. A small muddy area just past the fallen log can be easily bypassed on the left. One short section of the trail briefly leads slightly downhill through a grassy area after a sharp left, but otherwise the trail leads exclusively uphill. There are a few junctions with game trails, so be sure to look for trail markers anytime there seems to be two potential ways forward. (Some of the game trails have been purposely blocked with brush to prevent going the wrong way.) If you venture off the trail onto a game trail, you will know soon enough when you can’t find any trail markings and the trail seems overgrown after a short distance; in this case, retrace your steps until you find your last known point on the trail and look for the correct path. The trail stays fairly close to the edge of the slope above Grizzly Creek, so if you do lose the trail you can generally pick it up again by heading toward the creek; however, if you start descending the slope to the creek you’ve gone too far, and you’ll notice because this slope is very steep and brushy. About 0.4 miles past the “Grizzly Creek Trail” sign, the trail emerges into an open area with great views and good blueberry picking in late July/early August. For those seeking an easier hike, this is a great stopping point. (0.8 miles, 600 feet elevation gain.) Follow the trail markers on the treetops up through this area for a few hundred feet until the trail picks up again in the forest.
The trail continues uphill for another 0.4 miles and the grade turns steep near the end. The trail ends at tree line about 1.2 miles from the trailhead and around 3150 feet altitude for a total elevation gain of 1050 feet. From here, you may enjoy the views of Black Rapids Glacier to the SW, an unnamed glacier directly opposite the Delta River, and McGinnis Peak & Mount Moffit on a clear day. If you have AT&T cell phone service, you should have good cell reception & 4G LTE along nearly the entire trail; otherwise, don’t count on service. You may still be able to call 911 without AT&T, but an InReach or similar device is recommended for emergency communication since there are occasional blind spots on the trail.
Continuing beyond the end of the trail:

Arctic lupine growing above the end of the trail.
Adventurous hikers can continue up the slope above the end of the trail by following its north edge above the shrub line, which lies a few hundred feet higher. Some bushwhacking will be required, but if you choose your path wisely the brush will not be dense. Once above the brush line, continue following the ridge up with Grizzly Creek off to the left, but be cautious around exposed sections where a drop over the side could lead to severe injury. (It is easy to traverse just under the ridge on the left or right in these spots to avoid danger.) You may avoid the ridge altogether by angling up the slope to the right of the ridge, sticking to the vegetated area where the grade is less steep and the terrain not as rocky. Abundant wildflowers bloom on this slope in June and July. The ridge levels out near 4800 feet altitude after climbing over 1600 feet from the end of the trail. There is a nice spot to picnic or camp here with incredible views. Mount Hayes is now visible across the river, closely spaced beside Mount Moffit. Continuing past here is recommended for experienced off-trail hikers only.

The false summit viewed from the ridge below. Only hikers with experience ascending steep talus slopes should attempt climbing the false summit. Hikers may avoid the false summit by crossing Grizzly Creek near this spot (out of frame to the left) and ascending the adjacent slope.
Farther up the ridge is an obvious, steep false summit guarded by cliffs below its apparent peak. Do not attempt to bypass the cliffs on the right or you will run into more cliffs, and do not attempt to climb straight up the cliffs as the rock is generally rotten and the false summit is much higher than it seems when standing at its base. The cliffs can be bypassed by traversing around to the left, though the climb up the talus slope beyond them is very steep and can be particularly treacherous early in the summer (before mid-June) when ice and snow is still present, or after heavy rains when steep slopes in the eastern Alaska Range are at risk of landslides. Grizzly Creek descends in a series of waterfalls at the bottom of this slope to the left; avoid getting too close to the cliffs near the waterfalls as well. The false summit may require minor scrambling depending on the route you follow up but no technical climbing gear is needed. If deep snow is still present, be cautious of avalanche danger. When hiking on steep slopes with loose rock, remain hyperaware of your position above or below your hiking partners to avoid kicking rocks on each other—such an accident could be deadly. The false summit can be completely avoided by crossing to the opposite side of Grizzly Creek and climbing up the opposing slope to the neighboring ridge to the north. This slope is less steep and easier to navigate, and the broad ridge above eventually joins with the ridge above the false summit at the headwaters of Grizzly Creek.

Black Rapids Glacier Overlook at 6570 feet altitude, near the end of the route.
The ridge above the false summit levels out at 5800 feet altitude and features rewarding views. Continue climbing gently upward for another couple miles with spectacular cliffs to your right and Grizzly Creek to your left until you reach a high point above 6800 feet altitude overlooking Jarvis Glacier, where Jarvis Creek originates. You’ll pass an impressive cliff known as “Black Rapids Glacier Overlook” and a small glacier opposite One Mile Creek to your right just before the end of the route. Mount Silvertip looms at the head of Jarvis Glacier. It is typically windy and cold above the false summit, and snow may linger near the ridgeline above Jarvis Glacier throughout most of the summer, so gaiters and even a small pair of snowshoes may be useful for the final stretch. From the high point, it’s relatively straightforward to traverse along the ridgeline to the headwaters of Bear Creek, where the N or S ridge above Bear Creek can be followed back to the highway. See this map for an example of such a route:
Traveling south from the high point toward the Gunnysack Creek drainage requires bypassing more difficult obstacles and hikers should possess excellent route finding skills to avoid dangerous areas along the ridgeline.
Avoid high elevations above tree line when lightning is present or expected. (Check the forecast for Delta Junction, Alaska and Black Rapids, Alaska before your hike!) Thunderstorms are most frequent in the afternoon in June and July. Expect to encounter heavy snow on the upper portion of the route starting in September. Check out the FAA weather cams for the area (Black Rapids & Isabel Pass) to estimate the current snow line before you go. The trail typically becomes snowed over in October.
Water Availability:
Water typically flows in Grizzly Creek throughout the summer until freeze up. Once you pass the “Grizzly Creek Trail” sign, however, the creek climbs through a canyon, so it is not practical to collect water from the creek along the rest of the marked trail. In early summer, there will be several small streams emanating from snow patches on the slope above the end of the trail. But by July or so, these streams dry up, and water may not be available until the bottom of the false summit, so be sure to carry enough water for your hike. There are many trickle streams and snow for water throughout summer above the false summit. Filtering/purifying/boiling water is recommended, though Grizzly Creek runs very clear.
Bear Safety:
There are bears in the area, so stay alert and make noise while you hike, especially when rounding blind corners or cresting hilltops or passing through dense brush. Take time to survey the landscape around you—the farther away you can spot a bear, the better. DO NOT RUN FROM A BEAR!!! Carry bear spray or a firearm (safely) in a spot where you can immediately access it if needed. If carrying bear spray, learn how to use it BEFOREHAND—I recommend watching a few YouTube video demonstrations. Only use a firearm/ammunition combination capable of stopping a bear. Avoiding a surprise bear encounter is the best prevention against a bear attack, so don’t allow your bear deterrent to cause you to become complacent while hiking—bear deterrents are a last resort and will be tough to use on a charging bear. If you encounter a bear, speak calmly and wave your arms so it recognizes you as human—most bears in the area want to avoid humans. If a bear charges or approaches, stand your ground and be ready to deploy your bear deterrent, and try to look big and intimidating. Fight back against a black bear, play dead against a brown bear (grizzly) unless it’s displaying predatory behavior or continues attacking after you play dead. If you don’t already know all of this or haven’t encountered bears before, please overly familiarize yourself with bear safety so you can avoid panicking or making a potentially fatal mistake when you do:
https://www.nps.gov/subjects/bears/safety.htm.
Leave No Trace:
This trail is not maintained. Users are responsible for keeping it clean and protecting the surrounding landscape. Pack out everything you pack in, including toilet paper. (If you can safely burn it, do that.) Clean up any trash you do find. Don’t build unhelpful or potentially confusing rock cairns just for fun, they should only be used to help mark the route. Don’t build fire rings or fires, period, except in case of emergency, and especially avoid doing so in red flag conditions. Stick to the trail. Above where the trail ends, spread out when hiking in a group to lessen your impact on the vegetation, and stick to durable terrain where possible. Don’t feed or harass wildlife. (Along the route, you may see moose, caribou, Dall sheep, wolves, bears, coyotes, arctic ground squirrels, marmots, collared pikas, bald & golden eagles, perhaps even a wolverine.) If you’re not packing out human waste (let’s be real, almost nobody does), be sure to bury it six inches deep in organic soil 200 feet away from water sources including Grizzly Creek and away from the trail.
https://www.nps.gov/articles/leave-no-trace-seven-principles.htm