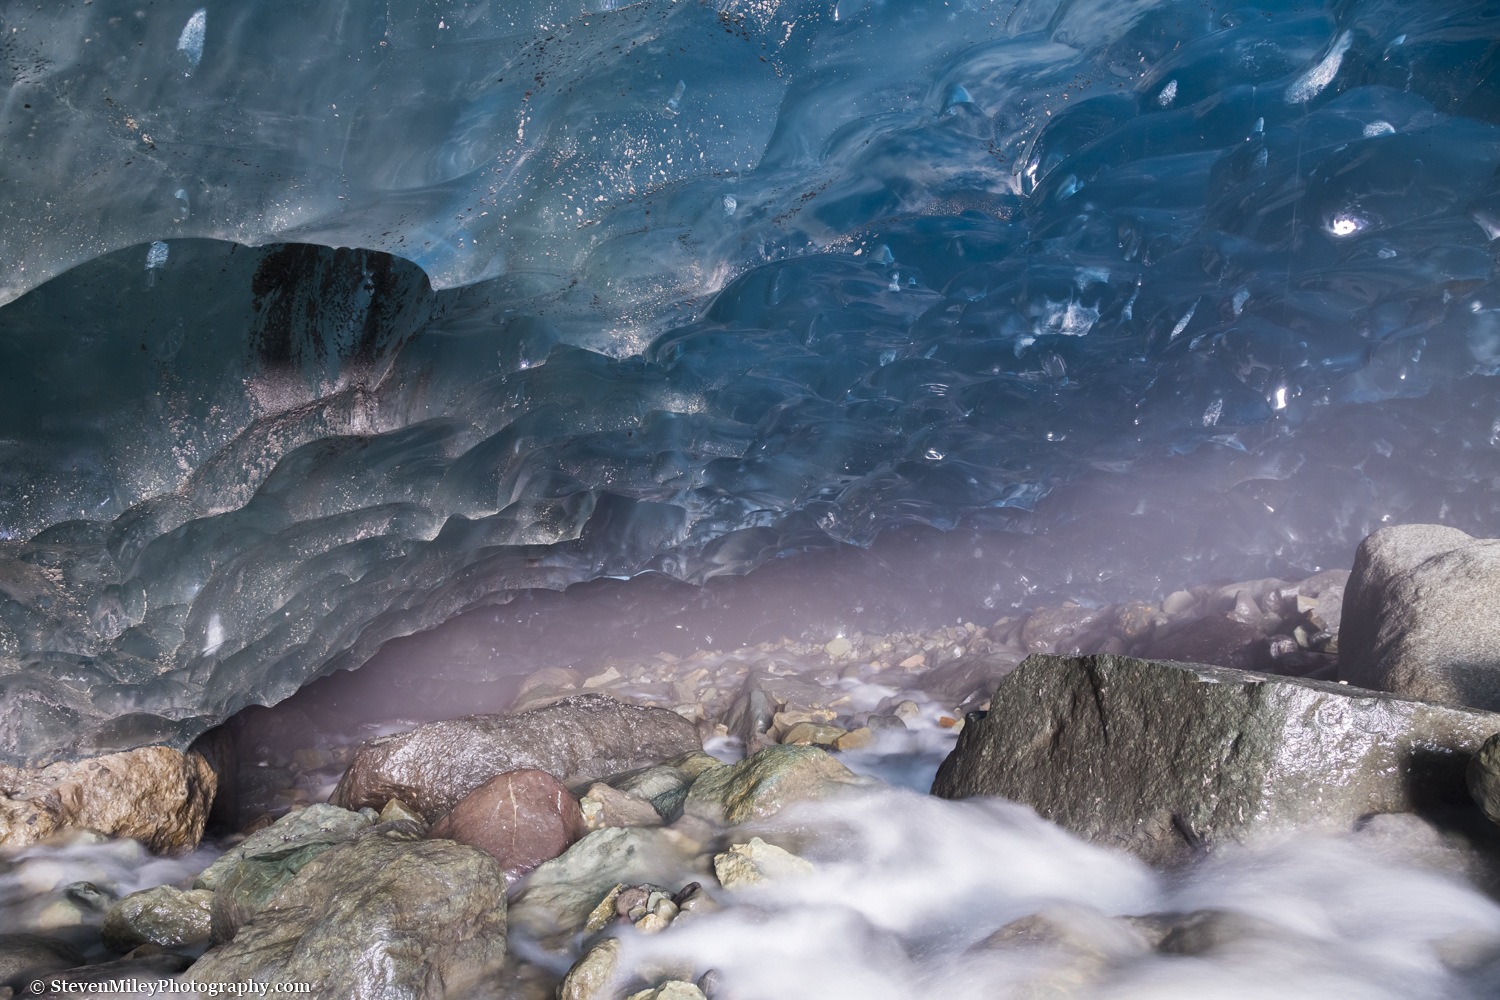
A stream from a nearby waterfall runs beneath the ice of Root Glacier, Wrangell-St. Elias National Park.
Google “Alaska ice caves” and you’ll see dozens of similar pictures of the stunning caves within Mendenhall Glacier near Juneau. These caves have gained significant fame due to the surreal images people have captured of them over the past several years. While the Mendenhall Glacier caves are very well known, ice caves form in most of the glaciers across Alaska, coming and going as water carves its way through the glacier ice. I’ve personally photographed dozens of caves across nine different glaciers, with each one offering unique opportunities for creative photography. If you’re hoping to photograph an ice cave, but aren’t sure what to expect, this overview will help you capture some winning shots.
Here’s a brief list of recommended equipment:
Camera with manual controls, preferably a DSLR or mirrorless camera with good high ISO performance
Tripod
At least one light source (flashlight, lantern, headlamp)
Warm, waterproof clothing and footwear
Helmet
Crampons or ice cleats
Some caves require crampons or ice tools to explore, but most caves I’ve entered have only required caution while walking (or sometimes crawling) inside. Still, it’s a good idea to use a pair of crampons or ice cleats to make walking less hazardous, especially if carrying expensive camera gear. If you are participating in a guided tour, any specialized gear will likely be provided, but ask in advance. In summer, the temperature is still near freezing inside an ice cave and water will be everywhere, so bring appropriate clothing and footwear.
Safety
It is much more dangerous to explore an ice cave in the summer when the ice is actively melting. Rocks on the edge of a high slope above an ice cave entrance will continuously tumble down as the ice melts, making entering and exiting a cave treacherous; avoid passing directly beneath the fall line as you quickly enter/exit the cave, covering your head if not wearing a helmet. Glacier ice contains rocks and other debris that fall out of the walls and ceiling of a cave as the interior melts, so be wary of a high ceiling and make certain to look up. The freezing glacial streams that run through most caves in the summer can also be hazardous if the flow is great. Even in winter, large pieces of ice that are visibly cracking away from the interior or exterior of a cave can be dangerous. Use common sense: if you see significant crumbling or collapsed ice around the entrance or inside, the cave is probably dangerous, and if you see overhanging ice that looks thin, poorly supported, or significantly cracked, don’t stand underneath. The ice cave entrance often features the thinnest, weakest ice. Heed any warnings from guides, rangers, or others about current ice instability. Last, but not least, most ice caves lie in difficult-to-reach areas of the backcountry, so you should be thoroughly prepared for traveling over rough terrain on unmarked trails, far from rescue personnel and safety.

This ice arch unsurprisingly collapsed the same summer this photograph was taken. Beware of poorly supported ice, cracking, signs of recent ice collapse, high ceilings, and rockfall when exploring ice caves and other formations on glaciers.
Where To Go
Besides Mendenhall Glacier near Juneau, you can easily find guided tours of Alaska ice caves in the summer at Root Glacier near Kennecott, Matanuska Glacier along the Glenn Highway, Spencer Glacier near an Alaska Railroad stop, and Valdez Glacier in Valdez, with some outfits offering winter tours as well. (Update: There were no accessible ice caves at Mendenhall Glacier in summer 2018. Ice caves change quickly in the summer and can disappear altogether, so check conditions before your trip and consider a winter visit to avoid surprises.) I've also been impressed by photographs I've seen of Iceland ice caves. I often photograph ice caves at Castner Glacier, Canwell Glacier, and Black Rapids Glacier in the Alaska Range, which typically contain several caves each, and I offer tours of these glaciers in winter as well. Black Rapids Glacier is my personal favorite, but that glacier requires considerable physical effort to access.
Camera & Tripod
Because you will be shooting in low light, a tripod and a camera with good high ISO performance are recommended to achieve the sharpest, highest quality photos. Don't expect to take any great shots with a cell phone or a basic point-and-shoot camera, except possibly near the entrance where there is ample light. A higher-end point-and-shoot camera that you can manually control should take some decent shots, but a DSLR or mirrorless camera is highly recommended, and a full-frame DSLR or mirrorless camera will provide the best image quality while also providing a wider field-of-view than a crop sensor camera, which is crucial when trying to cram more ice into the frame. A tripod is absolutely necessary for exposing details in the shadowy areas of an ice cave, where multi-second exposures may be required even at high ISOs, but a tripod will also allow you to shoot at lower ISOs and narrower apertures in lighter areas of a cave, reducing noise, improving sharpness, and providing a greater depth-of-field in your images. I used the Canon 6D to shoot ice caves for several years, recently upgrading to the Canon 5D Mark IV, and I've been completely satisfied with the performance of both, though any newer DSLR (less than 5-10 years old) should perform well.

Shooting in total darkness beneath Canwell Glacier. I manually focused on my lantern, then used a wireless shutter release to take a picture while standing as still as possible. Canon 6D, Canon 24-105mm f/4L @24mm, f/4, ISO 3200, 4 sec, tripod.
Lenses
Ultra-wide angle zoom lenses excel at fitting all the interesting details on the ceiling, walls, and floor of an ice cave into the frame, while providing the flexibility to zoom in for tighter shots without having to change lenses in a harsh environment. I use the Canon EF 11-24mm f/4L and the Canon 16-35mm EF f/2.8L III on a full-frame camera, which both deliver excellent image quality and very wide angles-of-view. The NIKKOR 14-24mm f/2.8G ED lens would be a great option for Nikon users. Lenses like these are very expensive, but they can be rented from local camera shops or online vendors such as LensRentals.com. Several quality third-party ultra-wide zoom lenses are available for crop-sensor DSLRs, such as the Tokina 11-16mm f/2.8, though there aren't as many for full-frame DSLRs.
That being said, it’s still easy to find creative uses for most lenses. A longer focal length may work better for portraits of people in the cave, or getting close-up shots of details in the ice. I frequently carry only a 35mm prime lens when shooting customer portraits on ice cave tours. In one lengthy tunnel, I even utilized my 300mm prime lens to snap a photo of my companions at the opposite end. "Fast" lenses with maximum apertures of f/2.8 and wider are not replacements for a tripod, but they will allow you to shoot in dimmer areas of the cave handheld (while sacrificing depth-of-field), and you can certainly get creative with blurred backgrounds of blue ice.

Details in the ice of a cave within Canwell Glacier. A longer focal length or a macro lens could be used to zoom in on rocks, bubbles, or cracks in the ice. Canon 5D Mark IV, Canon 11-24mm f/4L @24mm, f/8, ISO 100, 2.5 sec, tripod.
Photographing In Low Light
When you enter a cave, your eyes will take time to adjust to the dim lighting. Waiting for your eyes to adapt will make it easier to compose shots and focus. Remember to reduce the brightness of your camera’s LCD screen so your photos don’t look brighter than they actually are, possibly misleading you into underexposing your images. On my Canon 6D and 5D Mark IV, I’ve found using an LCD Brightness setting of “2” works best when working in very dim lighting or total darkness. Utilize the histogram display on your camera to ensure proper exposure, if available. Also, don’t forget a flashlight! Besides needing one to find your way around in a dark ice cave interior, a flashlight can be used to illuminate the part of the cave where you are trying to achieve focus. I generally bring both a headlamp and a small flashlight in case I lose one or the batteries die. Other light sources such as lanterns, flares, torches, etc., can add an interesting touch to a photo. Many camera/lens combinations will struggle to autofocus in dim lighting, and it can be close to impossible to manually focus while looking through the viewfinder; if your camera features a “Live View” function (i.e., the LCD display can be used to preview your exposure), you can use this mode to achieve pinpoint focus by zooming in on the LCD display, then manually focusing the lens. A circular polarizing filter could conceivably reduce reflections in the ice, but any filter will also reduce the amount of light hitting your camera's sensor, forcing even longer exposures, so I wouldn't utilize filters unless in a well-lit area of a cave.
ISO, Aperture, Shutter Speed
In general, ISO should be set as low as possible. For tripod-mounted shots, this generally means using ISO 100, although you may need to increase it to minimize subject blur if you are including a person in the frame. If you’re not using a tripod, you may still be able to take sharp photos handheld near the entrance where there is plenty of ambient light, but you will be forced to shoot at a high ISO and/or wider aperture in dimmer lighting. Brace yourself against the wall of the cave or find a rock or ledge where you can rest the camera to keep it steady. A flash can help, especially for portraits, but beware of the flash reflecting off the ice surface. Remember the reciprocal rule, which says the reciprocal of your shutter speed should be at least as large as your focal length in millimeters to take a sharp handheld photo. (Example: shutter speed should be faster than 1/20 sec if shooting at 20 mm.) I try to avoid shooting above ISO 800 if possible, but virtually never shoot above ISO 3200. You may find your camera stops providing acceptable image quality at a lower or higher ISO, depending on its capability and your personal preference.

I used a 10-sec time delay to get in place and bumped the ISO to 800 so I only had to stand still for about a second. The more blue ice in the frame, the better. Canon 6D, Canon 11-24mm f/4L @11mm, f/8, ISO 800, 0.8 sec, tripod.
I prefer shooting in “aperture priority” mode and adjusting the exposure compensation up and down as needed to control highlights or brighten shadows. Generally, I shoot in the f/8 to f/11 range on a full-frame camera to maximize depth-of-field and optimize image sharpness, but I may open the aperture wider when handholding the camera for candid shots of people or to focus on interesting objects (rocks, odd ice formations, etc.) inside the cave. Many times, the same composition can work at different exposures—especially if facing the cave entrance where you can expose for the scene outside or go for a “light at the end of the tunnel” effect. Experiment by increasing and decreasing your exposure by one or two stops—you can figure out which one works best later. HDR is a useful digital technique for capturing the shadowy details in a cave while also preventing any highlights from being blown out.

Handheld shot near the entrance of a Canwell Glacier cave. I shot at a wide aperture and high ISO to minimize blur from the movement of my subjects and from camera shake. Canon 5D Mark IV, Canon 11-24mm f/4L @24mm, f/4, ISO 800, 1/60 sec.
Reducing Vibration
Even on a tripod, a camera is still subject to small movements that can produce slightly soft images if proper care is not taken. Using a remote shutter release (preferably wireless) or else enabling a 2-second time delay on your camera will reduce vibration during the exposure caused by pressing the shutter release button. Some SLR cameras feature a “mirror lockup” setting, which should be enabled to reduce any vibrations caused by the mirror inside the camera swinging up prior to the shutter opening. Remove the neck strap from your camera or ensure it is not dangling back and forth. Turn off any image stabilization/vibration reduction feature on your lens because it may actually cause vibration if your camera is completely stationary. Be careful not to touch the camera or tripod during an exposure.

I used a wide angle and some distance between the camera and subject to exaggerate the size of this Augustana Glacier cave, though it was still really big! Canon 5D Mark IV, Canon 24-105mm f/4L @24mm, f/9, ISO 400, 1.3 sec, tripod.
Finding Interesting Compositions
Translucent blue ice can be mesmerizing, and it's tempting to simply point the camera at it and shoot, but if you want to create images that capture the viewer's eye or tell a story, you'll need to put a little thought into your compositions. Including a person in the frame can provide an important sense of scale and help orient viewers as they try to imagine themselves in the cave, but pay attention to the person's placement and pose. In particular, avoid having your subject blend in with a shadowy background. "Smile for the camera" shots are nice to put in a frame at home, but they're not going to win any photo contests, so try to capture your subject interacting with their surroundings in such a way that the viewer can sense the subject's emotions, or follow their path or gaze through the cave. Silhouettes work well against a cave entrance or potentially against brighter sections of translucent ice. Try to find the most interesting curves in the ice and let them wind around in the frame. Put interesting details in the foreground, like water cascading over rocks on the floor of a cave, or a piece of hoarfrost hanging from the ceiling. The colorful glacier ice is the star of the show, so don't be afraid to include plenty of it in the frame.

Get creative! You don't have to bring a dinosaur costume with you, but try to find a unique perspective or a novel idea for a shot that others haven't exhausted already.
Protecting Your Gear
In summer, the interior of an ice cave melts, and the water that continuously drips from the ceiling contains very fine glacial silt, which poses a threat to your camera gear. Glacial silt sticks to everything, and it will try to find its way into the zoom and focus rings on your lens, like sand at the beach. Accessories meant for protecting camera gear from rain can help keep your gear dry, but it's best to keep it stowed if not actively using it. Be prepared to wipe water off the front of your lens with a soft cloth that won’t scratch the glass. In winter, there's no water dripping, but it's still easy to kick up the dry silt on the floor of a cave, not unlike emptying the dust collector of a vacuum cleaner, so you should change your lens outside the cave if possible to prevent contamination of your camera sensor. I try to wipe my camera and lens down before changing lenses to remove any silt that inevitably collects on my gear.
Processing Your Photos
Digital cameras tend to get confused by the unusual lighting in ice caves when determining the proper white balance (resulting in undesirable color casts in your image), and they cannot handle the extreme contrasts found in ice caves as well as the human eye. If you're reading this article, odds are you're fairly serious about photography, and if you're not already processing your images, you should start! Digitally processing an image can bring it closer to how you actually perceived the scene or the artistic vision you had when you photographed it. In addition, you can fix lens imperfections like vignetting, distortion, and chromatic aberration if you are really in pursuit of perfection. I'll direct you to Google to learn more...
Conclusion
If photography is your hobby or profession and you're making a once-in-a-lifetime trip to see an ice cave, make sure you bring the right gear, and make sure you will have all the time you need to photograph. Prepare yourself for shooting in low light by practicing at night. (Aurora photographers will have a head start!) Don't forget to take care of your gear as well as your own safety.
Leave a comment or shoot me an email if you have questions. Thanks for reading and good luck!
Want to photograph an ice cave in Alaska? Check out my Black Rapids Tours winter offerings.